Hull: First Planking Without Stealer
Hull: First Planking Without Stealer
- Here is a method of planking which avoids long adjustments in the cutting of "stealers".
- "A wooden piece is known as cut out in stealer, when the end becomes an oblique or gradually thinned surface, so as to end in a simple line".
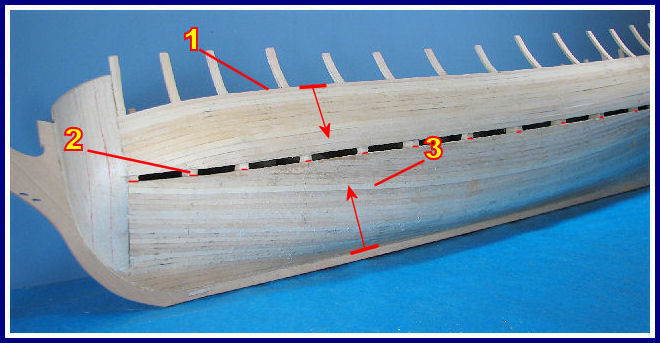
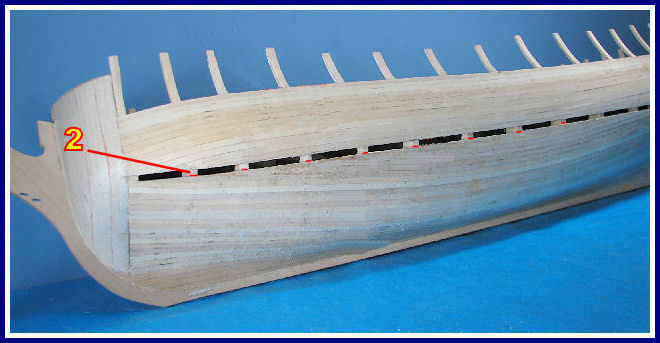
- Planking starts at the level of the deck (1) and will go on as long as the strakes are laid unconstrained (do not bore themselves). Then trace, under the last strake and on the section of the bulkheads, a line marking the width of the last strake (2).
- Continue planking the keel towards the top (3). During this part of planking, the strakes are bent, glued and then the stealers will be cut while following the lower line of the last strake (2).
- Video


- showing the bending and the installation of the lower strakes (3)
- Explanations about the video:
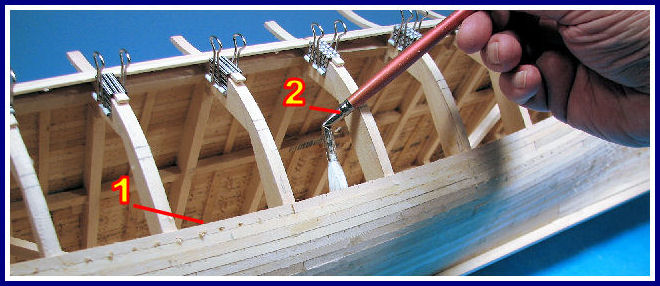
- The strake bending is done thanks to notches on the inner side of the curve of the strake.
- To mark on the strake the section to be notched, make a first mark at the beginning of the curve and a second mark at the end of the curve.
- A pattern is arranged to hold the strakes on the section and to make regularly spaced notches.
- The notches are made on 1/3 of the width of the strakes. Two strips are glued (cyano gel) on the blade of the razor saw to control the depth of the notches.
- In order to glue the strake, use carpenter's glue. The end of the needle of the syringe used to apply glue has a small collar which facilitates the application of the glue on the section of the strakes.
- During the drying of the glue, magnets, coupled two by two, will act as a clip to maintain the strakes one against the other and at the same level.
- Finally, "improved" paper clips press the strake against the bulkheads.
- Video
- showing how to cut the stealers and how to install the last strake (2).
- Explanations about the video:
- As planking progresses, check and adjust the section of the bulkheads so that the curve of the hull is regular.
- Once the strake is glued, cut its end in stealer. Gluing with cyano gel is done only on the ends to be cut. Use carpenter's glue on the rest of the strake.
- Finally, it remains only the opening of the last strake, over the entire length of the hull. For holding this strake well, use cyano gel on the sections of the bulkheads.
- 1. While planking progresses and that the inside of the hull is still accessible.
- 2. Apply carpenter's glue on the inside of planking.
Back Back

Copyright © 2010 Hubert Sicard